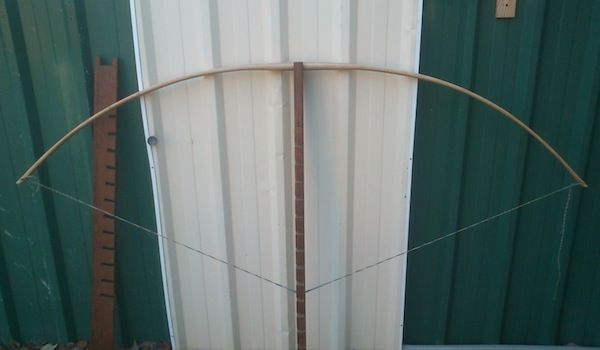
One essential piece of bow making hardware is the tillering stick. Some people hate it, deriding it because to use it requires the bow to be left on it under tension. These people usually have something fancy with pulleys and very long ropes that allow them to draw the bow from the other side of the room and see the bow flex from a distance.
I am sure these devices work well for those that use them. I have not so couldnât say for sure. I donât know how many bows Iâve made; into the hundreds perhaps. But I canât remember the last one I made without a tillering stick.
For me, the tillering stick is a wonderfully simple device that makes tillering easy.
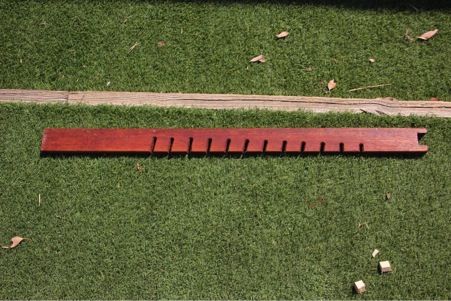
Here is a picture of one used in the classes at Tharwa Valley Forge:

It is very simple, but there are some design features of note:
- It is made of dense hardwood for strength. Pine, MDF, ply and most samples of Tas Oak will not withstand the forces.
- The notch at the top is just a little wider than the widest handle I anticipate making.
- The grooves for draw length start six inches below the handle-notch, and are spaced about every inch and a half.
- The depth of these grooves increases with the draw length. This is to ensure that as the draw length (and draw weight) increase through tillering, there is the maximum amount of wood between the groove holding the string and the notch holding the handle.
- The tillering stick is far longer than any reasonable draw length. This is so that you wonât be scraping your knuckles on the ground at the final stages of tillering, and it also serves to lift the bow up closer to eye height, which makes identifying flaws easier.
This is a semi-deluxe version of the grooves for the string have been chamfered with a 90 degree router bit. You could round the edges with sandpaper or a chisel though. This reduces wear on the string through the course of tillering.
The tillering stick can be leaned against a wall or other upright, or clamped in place.
